
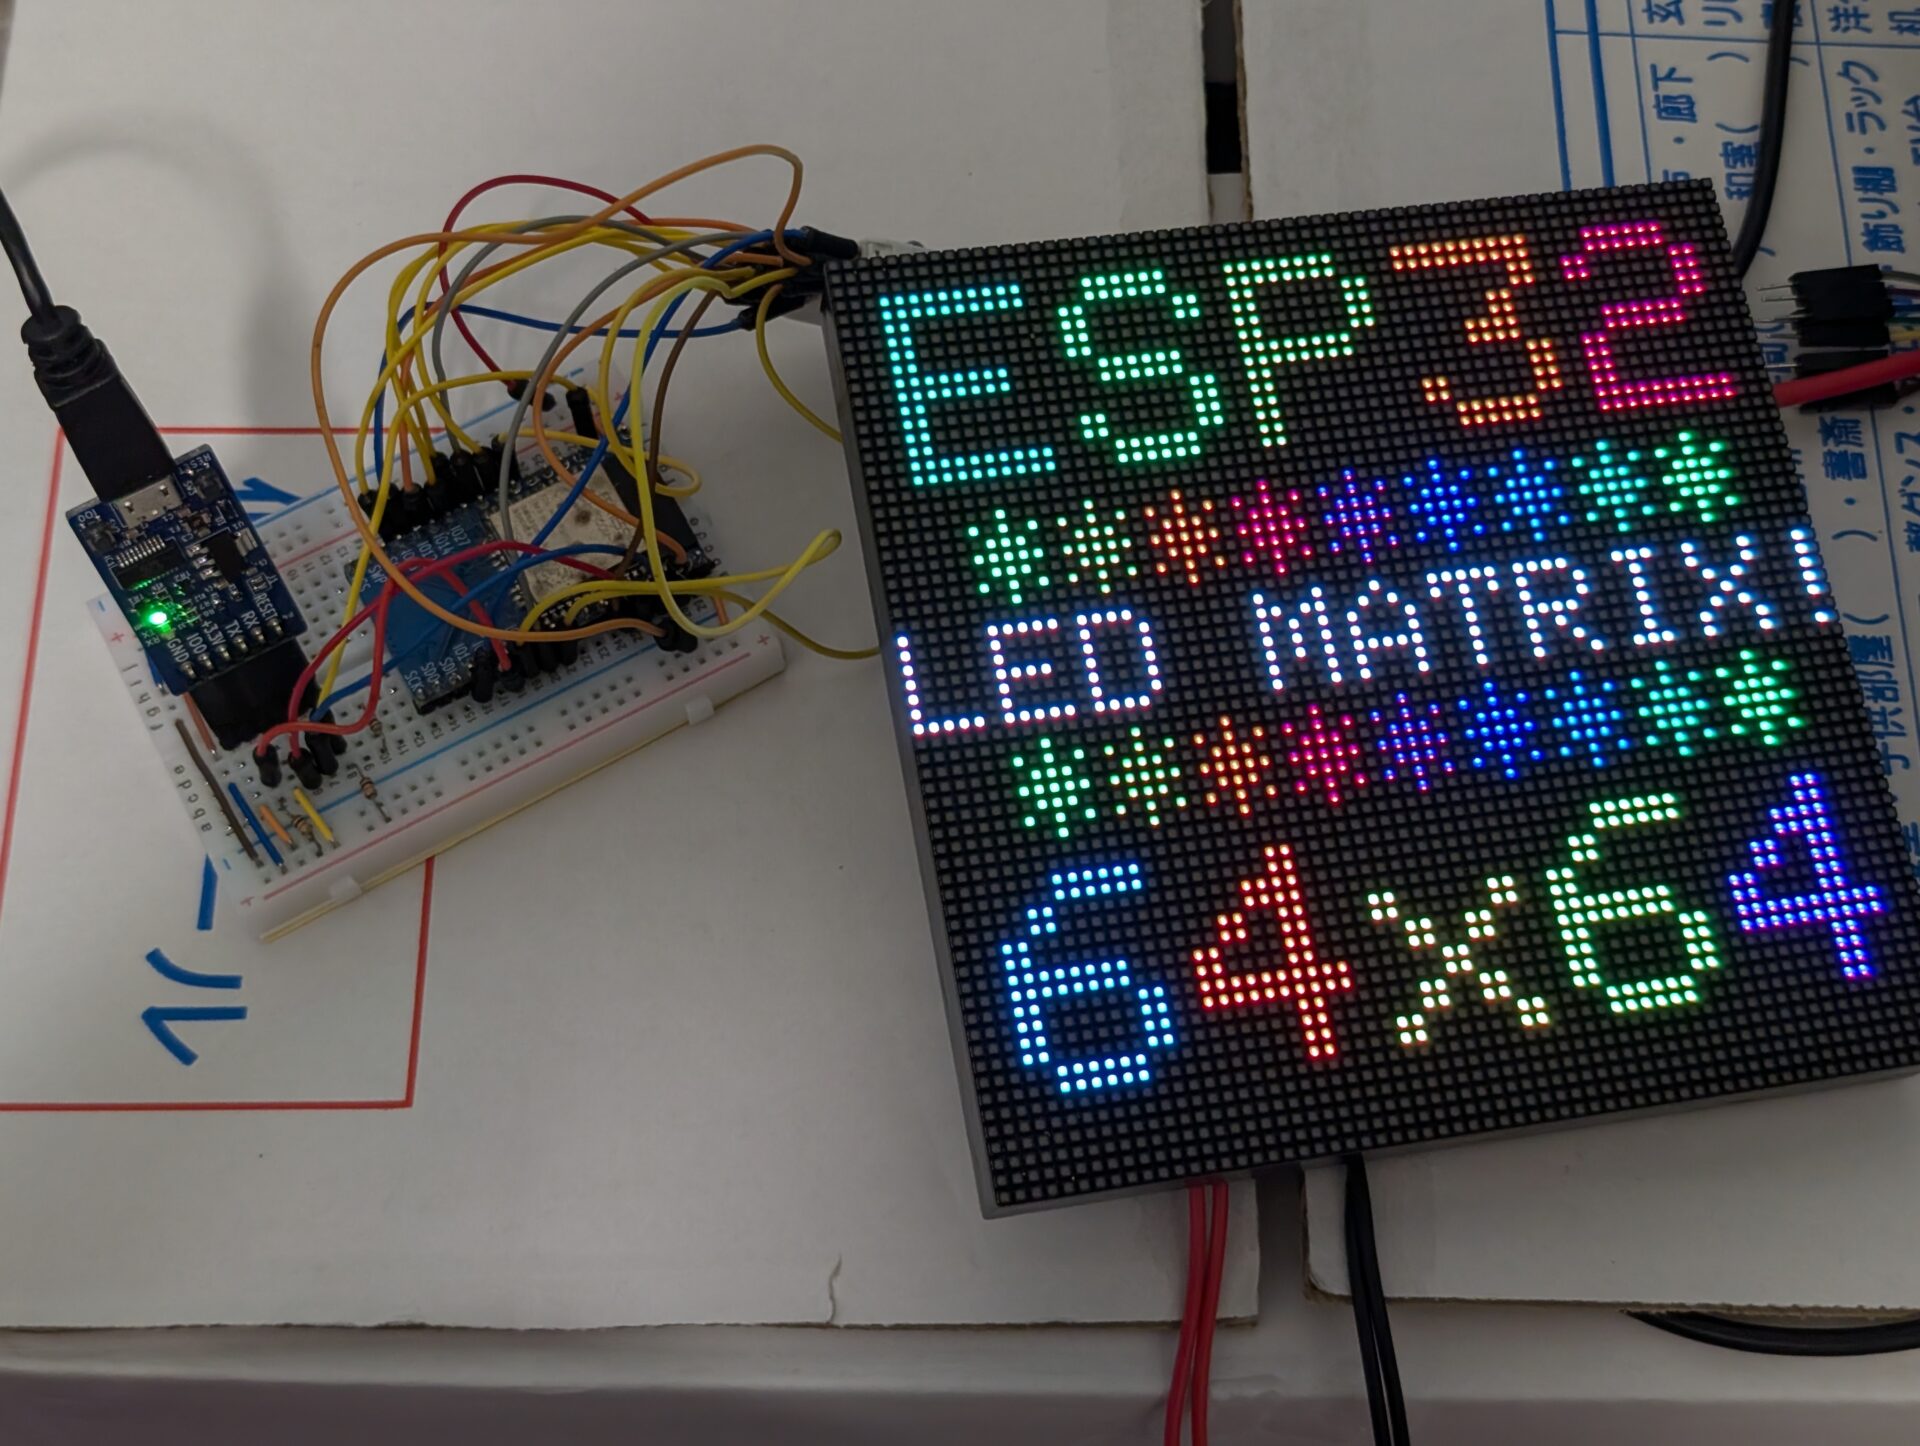
64×64の2mmピッチLEDディスプレイをESP32で使うための備忘録です。
部品
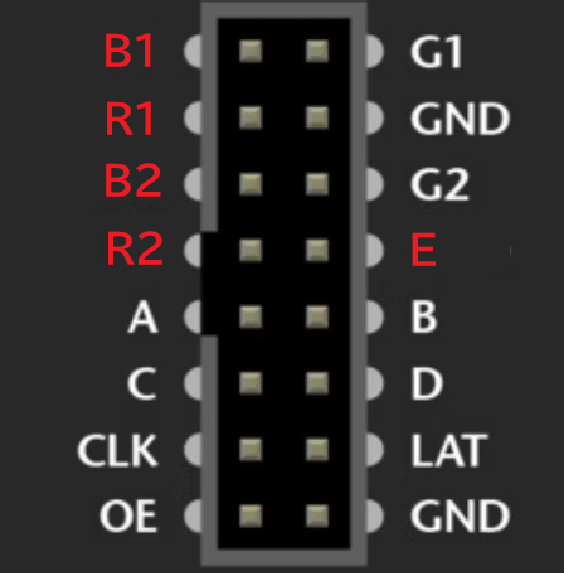
HUB75Eディスプレイ

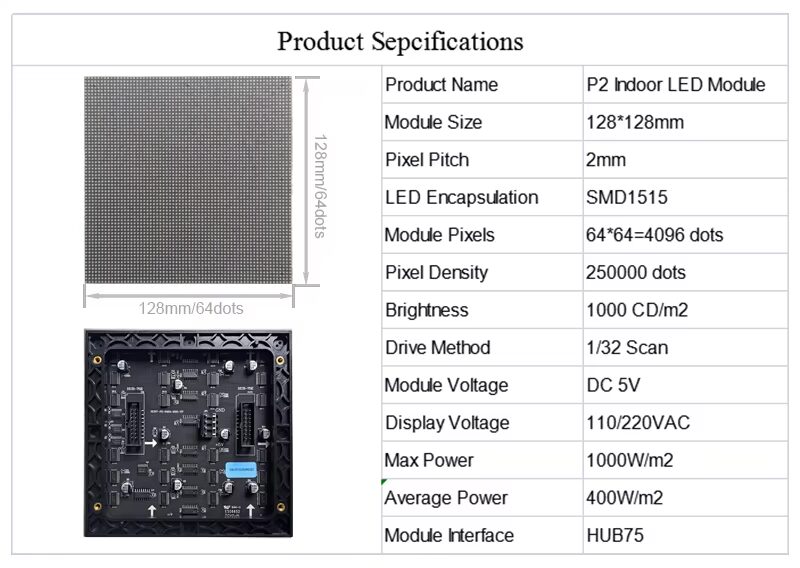
一般的なHUB75規格のLEDディスプレイとピン配置がやや異なります。ピン配置の違いについてはプログラム上で変更することも可能です。HUB75規格ではABCDの4bit(0~15)で行を指定しますが、このディスプレイではABCDEの5bit(0~31)で行を指定します。また、B1⇔R1、B2⇔R2が入れ替わっているだけなので、表示してみて色が違うなーとなったら入れ替える感じです。
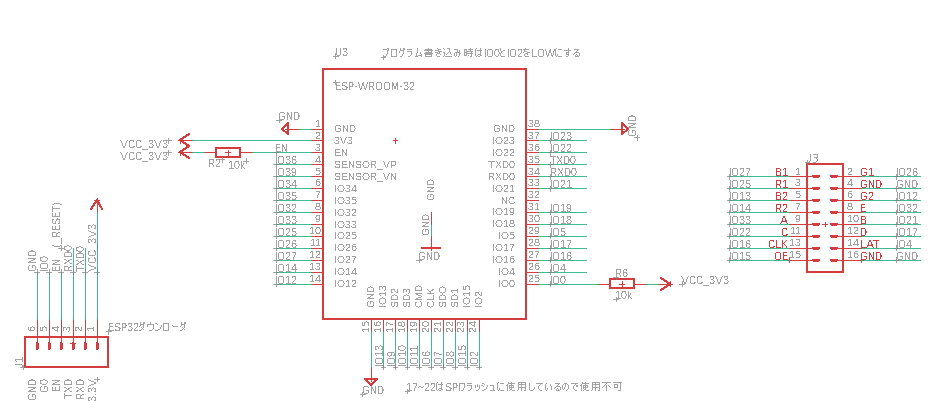
ESP32基板
同じものではないですが、こんな感じのピッチ変換基板を使っています。
https://www.switch-science.com/products/3170?_pos=3&_sid=344e04c71&_ss=r
ESP32ライタ
これでなくても良いですが、3.3V出せてRESET(EN)とGP0が信号が付いているやつ。
https://www.switch-science.com/products/7471?variant=42382162460870
ジャンパワイヤ
ノイズが乗りやすいので、短めのものが良いです。

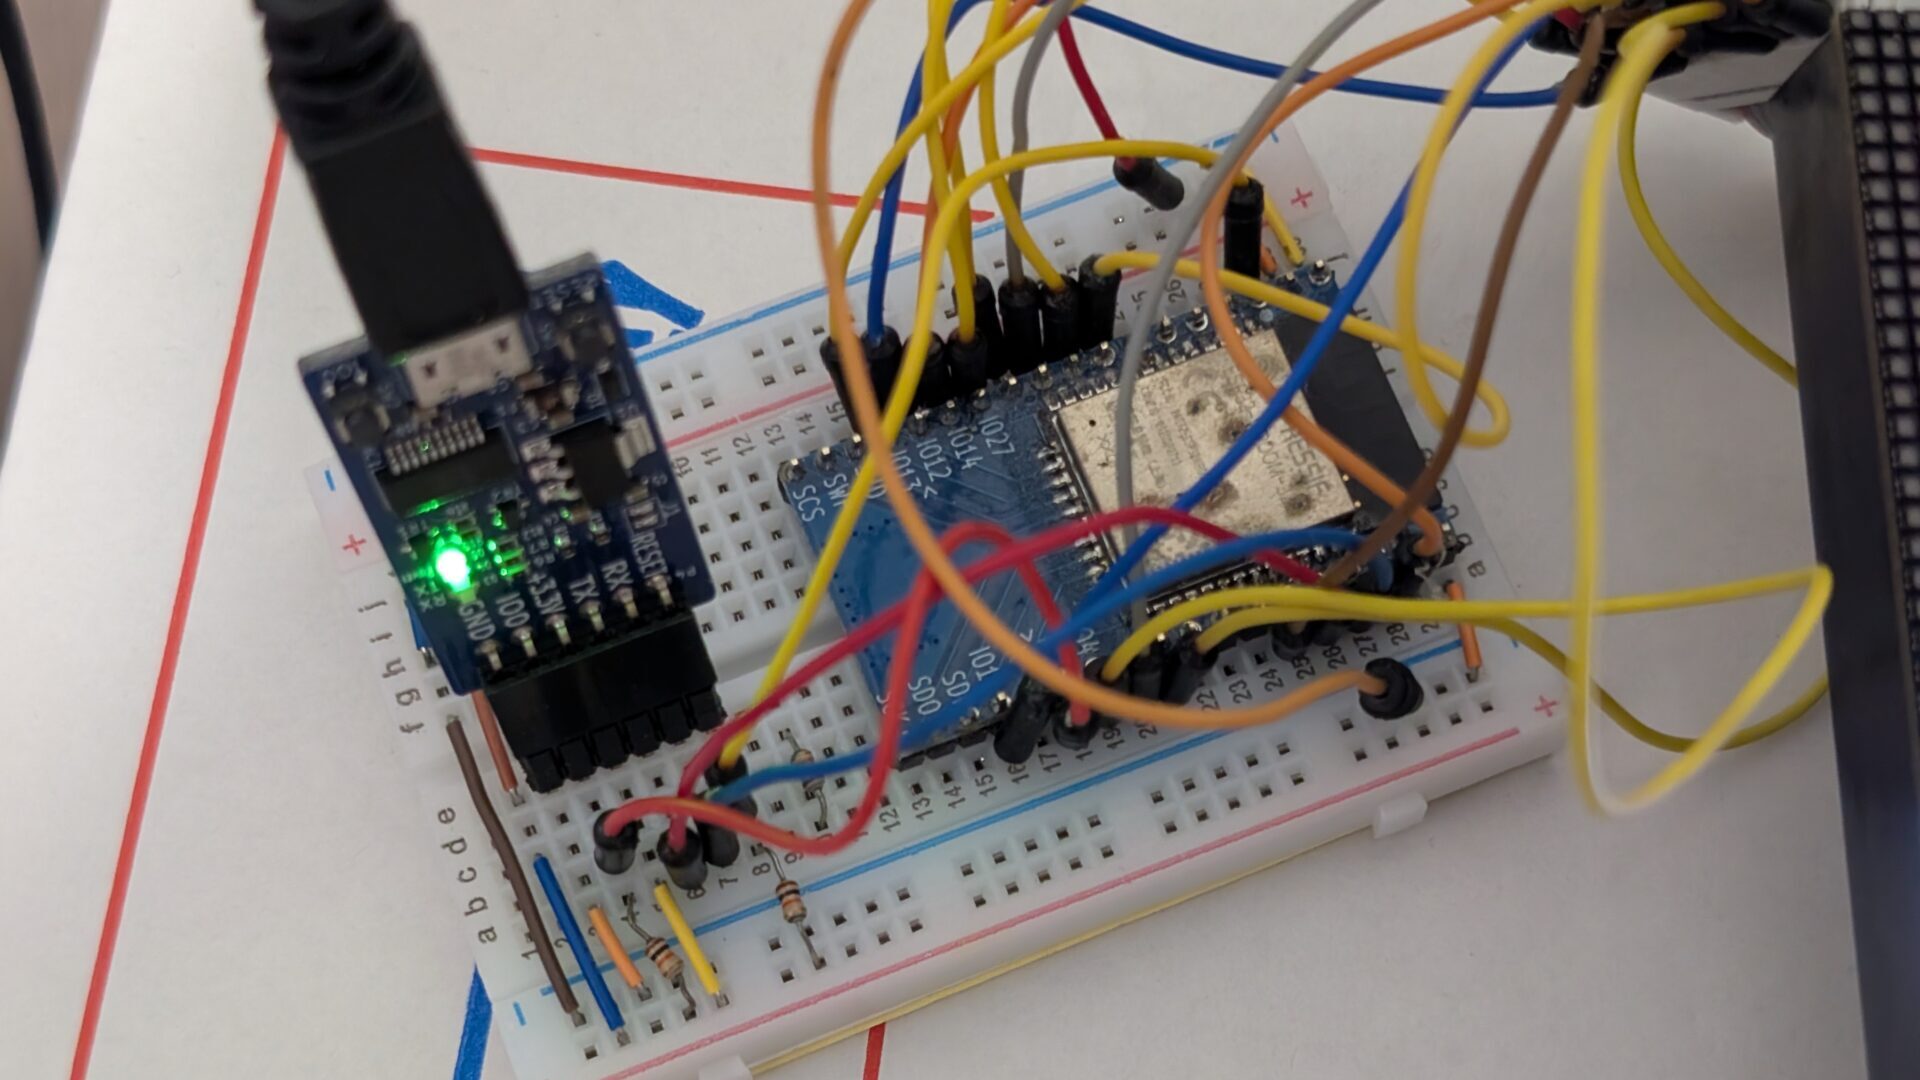
接続
・HUB75Eのソケットの向きに注意する
・IO0とENを10kΩで3.3Vとプルアップする
・書き込みがうまくいかないときはIO2をGNDに10kΩでプルダウンする
プログラム
ESP32-HUB75-MatrixPanel-I2S-DMAライブラリのインポートが必要です。

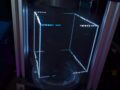
白(全表示)→赤(全表示)→緑(全表示)→青(全表示)→白四角枠→白円を表示するプログラム。色が違ったらR/G/Bの位置を入れ替える。それっぽい画像が出てくるが表示位置が崩れているときはA/B/C/D/Eの位置を確認する。
|
1 2 3 4 5 6 7 8 9 10 11 12 13 14 15 16 17 18 19 20 21 22 23 24 25 26 27 28 29 30 31 32 33 34 35 36 37 38 39 40 41 42 43 44 45 46 47 48 49 50 51 52 53 54 55 56 57 58 59 60 61 62 63 64 65 66 67 68 69 70 71 72 73 74 75 76 77 78 79 80 81 82 83 84 85 |
#include <ESP32-HUB75-MatrixPanel-I2S-DMA.h> // ピン配置 /* #define R1_PIN 25/A1 #define G1_PIN 26/A0 #define B1_PIN 27 #define R2_PIN 14 #define G2_PIN 12 #define B2_PIN 13 #define A_PIN 23/SDA->33 #define B_PIN 19/MISO->21 #define C_PIN 5/SCK->22 #define D_PIN 17 #define E_PIN -1->32 // required for 1/32 scan panels, like 64x64px. Any available pin would do, i.e. IO32 #define LAT_PIN 4/A5 #define OE_PIN 15 #define CLK_PIN 16 */ #define RES_X 64 // 使用するLEDパネルの横方向のピクセル数 #define RES_Y 64 // 縦方向のピクセル数 #define CHAIN 1 // 使用するLEDパネルの横方向の連結数 #define A_PIN 33 // remap esp32 library default from 23 to 33 #define B_PIN 21 // remap esp32 library default from 19 to 21 #define C_PIN 22 // remap esp32 library defaultfrom 5 to 22 #define E_PIN 32 // HUB75のE端子の定義:規定値がないので必要に応じて定義する必要がある #define R1_PIN 27 #define B1_PIN 25 #define R2_PIN 13 #define B2_PIN 14 MatrixPanel_I2S_DMA *dma_display = nullptr; void setup() { HUB75_I2S_CFG mxconfig(RES_X, RES_Y, CHAIN); if (RES_Y == 64){ mxconfig.gpio.a = A_PIN; mxconfig.gpio.b = B_PIN; mxconfig.gpio.c = C_PIN; mxconfig.gpio.e = E_PIN; // 縦が64ピクセルで1/32スキャンのパネルを使用する場合 //mxconfig.gpio.r1 = R1_PIN; //mxconfig.gpio.b1 = B1_PIN; //mxconfig.gpio.r2 = R2_PIN; //mxconfig.gpio.b2 = B2_PIN; } mxconfig.clkphase = false; // 表示された城枠の左端が表示されない場合にはこの行を有効にする mxconfig.setPixelColorDepthBits(4); // Display Setup dma_display = new MatrixPanel_I2S_DMA(mxconfig); dma_display->begin(); dma_display->setBrightness8(255); //0-255 for(int16_t i=0;i<64;i++){ for(int16_t m=0;m<64;m++){ dma_display->drawPixelRGB888(m, i, i*4,0,m*4); } } } void loop() { dma_display->fillScreenRGB888(127, 127, 127); // 白は全LEDの点灯になり電流を消費するので、値を抑えています delay(2000); dma_display->fillScreenRGB888(255, 0, 0); // LEDの発色強度は、赤、緑、青の順番で指定: 0-255 delay(2000); dma_display->fillScreenRGB888(0, 255, 0); delay(2000); dma_display->fillScreenRGB888(0, 0, 255); delay(2000); dma_display->clearScreen(); dma_display->drawRect(0, 0, dma_display->width(), dma_display->height(), dma_display->color444(8, 8, 8)); delay(2000); dma_display->clearScreen(); dma_display->fillCircle(32, 32, 31, dma_display->color444(8, 8, 8)); delay(2000); } |
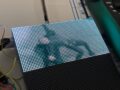
ESP32-HUB75-MatrixPanel-I2S-DMAライブラリのスケッチ例をこのディスプレイ用にアレンジしたもの。
|
1 2 3 4 5 6 7 8 9 10 11 12 13 14 15 16 17 18 19 20 21 22 23 24 25 26 27 28 29 30 31 32 33 34 35 36 37 38 39 40 41 42 43 44 45 46 47 48 49 50 51 52 53 54 55 56 57 58 59 60 61 62 63 64 65 66 67 68 69 70 71 72 73 74 75 76 77 78 79 80 81 82 83 84 85 86 87 88 89 90 91 92 93 94 95 96 97 98 99 100 101 102 103 104 105 106 107 108 109 110 111 112 113 114 115 116 117 118 119 120 121 122 123 124 125 126 127 128 129 130 131 132 133 134 135 136 137 138 139 140 141 142 143 144 145 146 147 148 149 150 151 152 153 154 155 156 157 158 159 160 161 162 163 164 165 166 167 168 169 170 171 172 173 174 175 176 177 178 179 180 |
// Example sketch which shows how to display some patterns // on a 64x32 LED matrix // #include <ESP32-HUB75-MatrixPanel-I2S-DMA.h> #define PANEL_RES_X 64 // Number of pixels wide of each INDIVIDUAL panel module. #define PANEL_RES_Y 64 // Number of pixels tall of each INDIVIDUAL panel module. #define PANEL_CHAIN 1 // Total number of panels chained one to another #define A_PIN 33 // remap esp32 library default from 23 to 33 #define B_PIN 21 // remap esp32 library default from 19 to 21 #define C_PIN 22 // remap esp32 library defaultfrom 5 to 22 #define E_PIN 32 // HUB75のE端子の定義:規定値がないので必要に応じて定義する必要がある #define R1_PIN 27 #define B1_PIN 25 #define R2_PIN 13 #define B2_PIN 14 //MatrixPanel_I2S_DMA dma_display; MatrixPanel_I2S_DMA *dma_display = nullptr; uint16_t myBLACK = dma_display->color565(0, 0, 0); uint16_t myWHITE = dma_display->color565(255, 255, 255); uint16_t myRED = dma_display->color565(255, 0, 0); uint16_t myGREEN = dma_display->color565(0, 255, 0); uint16_t myBLUE = dma_display->color565(0, 0, 255); // Input a value 0 to 255 to get a color value. // The colours are a transition r - g - b - back to r. // From: https://gist.github.com/davidegironi/3144efdc6d67e5df55438cc3cba613c8 uint16_t colorWheel(uint8_t pos) { if(pos < 85) { return dma_display->color565(pos * 3, 255 - pos * 3, 0); } else if(pos < 170) { pos -= 85; return dma_display->color565(255 - pos * 3, 0, pos * 3); } else { pos -= 170; return dma_display->color565(0, pos * 3, 255 - pos * 3); } } void drawText(int colorWheelOffset) { // draw text with a rotating colour dma_display->setTextSize(2); // size 1 == 8 pixels high dma_display->setTextWrap(false); // Don't wrap at end of line - will do ourselves dma_display->setCursor(3, 3); // start at top left, with 8 pixel of spacing uint8_t w = 0; const char *str = "ESP32"; for (w=0; w<strlen(str); w++) { dma_display->setTextColor(colorWheel((w*32)+colorWheelOffset)); dma_display->print(str[w]); } dma_display->println(); dma_display->setTextSize(1); dma_display->print(" "); for (w=9; w<18; w++) { dma_display->setTextColor(colorWheel((w*32)+colorWheelOffset)); dma_display->print("*"); } dma_display->println(); dma_display->setTextColor(dma_display->color444(15,15,15)); dma_display->println("LED MATRIX!"); dma_display->print(" "); for (w=9; w<18; w++) { dma_display->setTextColor(colorWheel((w*32)+colorWheelOffset)); dma_display->print("*"); } dma_display->println(); dma_display->setTextSize(2); dma_display->setCursor(3, 44); // print each letter with a fixed rainbow color dma_display->setTextColor(dma_display->color444(0,8,15)); dma_display->print('6'); dma_display->setTextColor(dma_display->color444(15,4,0)); dma_display->print('4'); dma_display->setTextColor(dma_display->color444(15,15,0)); dma_display->print('x'); dma_display->setTextColor(dma_display->color444(8,15,0)); dma_display->print('6'); dma_display->setTextColor(dma_display->color444(8,0,15)); dma_display->print('4'); } void setup() { // Module configuration HUB75_I2S_CFG mxconfig( PANEL_RES_X, // module width PANEL_RES_Y, // module height PANEL_CHAIN // Chain length ); mxconfig.gpio.a = A_PIN; mxconfig.gpio.b = B_PIN; mxconfig.gpio.c = C_PIN; mxconfig.gpio.e = E_PIN; // 縦が64ピクセルで1/32スキャンのパネルを使用する場合 //mxconfig.gpio.r1 = R1_PIN; //mxconfig.gpio.b1 = B1_PIN; //mxconfig.gpio.r2 = R2_PIN; //mxconfig.gpio.b2 = B2_PIN; mxconfig.clkphase = false; //mxconfig.driver = HUB75_I2S_CFG::FM6126A; // Display Setup dma_display = new MatrixPanel_I2S_DMA(mxconfig); dma_display->begin(); dma_display->setBrightness8(90); //0-255 dma_display->clearScreen(); dma_display->fillScreen(myWHITE); // fix the screen with green dma_display->fillRect(0, 0, dma_display->width(), dma_display->height(), dma_display->color444(0, 15, 0)); delay(500); // draw a box in yellow dma_display->drawRect(0, 0, dma_display->width(), dma_display->height(), dma_display->color444(15, 15, 0)); delay(500); // draw an 'X' in red dma_display->drawLine(0, 0, dma_display->width()-1, dma_display->height()-1, dma_display->color444(15, 0, 0)); dma_display->drawLine(dma_display->width()-1, 0, 0, dma_display->height()-1, dma_display->color444(15, 0, 0)); delay(500); // draw a blue circle dma_display->drawCircle(10, 10, 10, dma_display->color444(0, 0, 15)); delay(500); // fill a violet circle dma_display->fillCircle(40, 21, 10, dma_display->color444(15, 0, 15)); delay(500); // fill the screen with 'black' dma_display->fillScreen(dma_display->color444(0, 0, 0)); //drawText(0); } uint8_t wheelval = 0; void loop() { // animate by going through the colour wheel for the first two lines drawText(wheelval); wheelval +=1; delay(20); /* drawText(0); delay(2000); dma_display->clearScreen(); dma_display->fillScreen(myBLACK); delay(2000); dma_display->fillScreen(myBLUE); delay(2000); dma_display->fillScreen(myRED); delay(2000); dma_display->fillScreen(myGREEN); delay(2000); dma_display->fillScreen(myWHITE); dma_display->clearScreen(); */ } |
コメント